As we covered in our previous post-
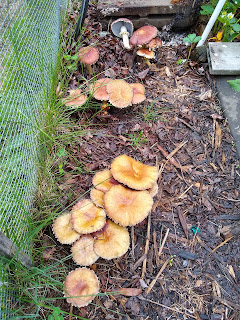
Wine Cap mushrooms are an incredible organism that have the ability to turn cardboard, straw, and/or wood chips into a rich, loamy soil. Wine caps are usually planted as the soil warms up in the spring after the last frost date until several weeks before the first frost date in the Fall of the year. While the Wine Cap mycelium grows specifically on woody plant material (wood chips, straw, or a mix), the mycelium will reach down into the soil and pull up soil-water nutrients into the developing mushroom cap, which eventually forms the vehicle for dispersal of Wine Cap progeny... the spore! This is why Wine Caps are anecdotally known as "The Recycler" as Wine Cap mycelium engages in movement of nutrients from soil to surface... a great asset in the garden.
Building a Mushroom Bed for Larger Areas:
Guidelines from Phoebe Krawczyk at Field & Forest Products
This is a great bed installation method if you are putting in large beds or creating new garden spaces over perennial weeds, like quack grass . This usually does not give complete control of the weeds but will significantly suppress their survival. In the end, you have a nice mushroom bed and the cardboard (except for the strapping tape) will have disappeared. This method includes three ingredients in the layers, plus the spawn.
Layer 1: Wet Cardboard
Cardboard dries quickly and can inhibit growth at the soil surface. Soak it or sprinkle it until it is thoroughly wet just prior to inoculation. Lay out the cardboard to make up the base of your bed. If your cardboard sheets are big, poke some holes in it with a pitchfork or poker to allow excess rainfall to drain away.
 |
| Cardboard goes fast once you start laying it out |
Layer 2: Soaked Straw
Soak the straw. Just getting the straw thoroughly wetted (24 hours) will suffice, but leaving the straw for up to 72 hours can soften the straw and speed spawn run. One small square bale can cover 50 sq feet. The straw can be wheat, oat, barley, rye .... even old straw that is just starting the decomposition process if let out in the rain. The straw layer should be 3 inches deep.
 |
| Bales can make good benches to take a break on, too |
Layer 3: Woodchips
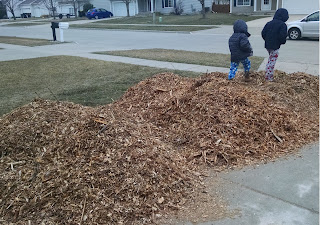
Use wood chips that are fresh or show only minor decay from composting ( 1 - 12 months, sometimes older, depending on location and species). If the chips come to you bagged and dry, soak or hydrate them first. Spread the chips over the straw to completely cover the straw by several inches. You will want the straw to stay covered, lest it dry out before the spawn runs. Usually for a 50 sq ft bed you will need 3 wheel-barrows of chips.
 |
| Tree service woodchips fresh off the truck |
Bed maintenance is very low-key but the important indicator is if bed is dry at soil level. The top layer of a bed will almost always dry out, but when you plunge your hand into the bed to feel the moisture at soil wood chip interface, it should feel very moist. Your watering regime should aim for maintaining that moist layer- this usually translate to about 1 inch of rainfall or garden sprinkler fall per week.
Your first harvests can come as early as 4 weeks after inoculation, especially if you use straw in the mix. Straw/ Wood chip beds usually last 1 and 1/2 seasons.
Thanks Phoebe!
Now is a great time to purchase spawn as you plan your garden or food forest. Following the link at the sidebar, or off their website here!
If you follow these tips, you'll have lots of delicious mushrooms PLUS an area with super rich soil, with most of the weeds & grass under control, ready to plant with flowers, vegetables or even a new food forest or orchard!
Wine Cap spawn can even keep running and fruiting with regular additions on fresh woodchips in the food forest understory.
If you want a food forest, mixed orchard or ecological landscape, we would love to help you make it happen!


No comments:
Post a Comment